
Following with our design of AstroPlant, this post has instructions, BOM and details to build a new DoItYourself hydroponic kit using common and cheaper materials to be used in the AstroPlant Maker LITE Edition (MLE). This design fits only in the MLE so you should build this version of AstroPlant first. For the original Maker Edition (ME) you will need the original Waterfarm hydroponic kit.
Index:
3.- Building your hydroponic kit
Hydroponic systems
We have designed a new low-cost hydroponic system using IKEA 365+ food containers but keeping in mind the original system used in the AstroPlant project (Drip System). If you wanted to avoid the air compressor to save money, maybe you could adopt a Hydroponic Passive System.
Passive Systems use a capillary (plant’s roots partial submerged) or wick system to deliver nutrients directly to a plant’s roots. Passive Systems are incredibly simple and they do not even require electricity to function, however, require you to change the water more frequently than any other hydroponic system.
Since there is no pump, there is nothing to stop algae from growing and soiling the water quality. Passive Systems also are not as efficient at recovering nutrients, as there is no way to recover what is not directly absorbed by the plants. These systems work but are not viewed as the best option for those looking to grow hydroponically.
If you decide to use a Passive System you should give details about it when you submit your Excel sheet with measurements of your basil experiments to the AstroPlant team.
Bill of materials
IKEA 365+ containers
| ITEM | Ikea Ref. | SHOP Link | Cost |
|---|---|---|---|
| Solution container | 603.930.66 | IKEA 365+ food container 4,2L | 3 € |
| Plant container | 603.591.52 | IKEA 365+ food container 2,0L | 2 € |
The AstroPlant Maker Lite Edition was designed specifically for these two containers. If you wanted to use any other container you should change the base support drawing (download CAD files from AstroPlant Maker LITE Edition)
Using the plant container inside the solution container you will have about 2,5 L of capacity for nutrient solution.
Air-lift system
To design an airlift solution similar to that included in the Waterfarm, you will need a rigid plastic pipe and an air compressor with a flexible tube (see picture #1 with the operating principle of an airlift system). To drive air inside the pipe you must connect the flexible air tube to the lower section of the water pipe. To do this and if you have a 3D printer, maybe you can search on the Internet to find a 3D model of a venturi air injector, similar like that in picture #2. If not, you can always look for another way to connect both elements.
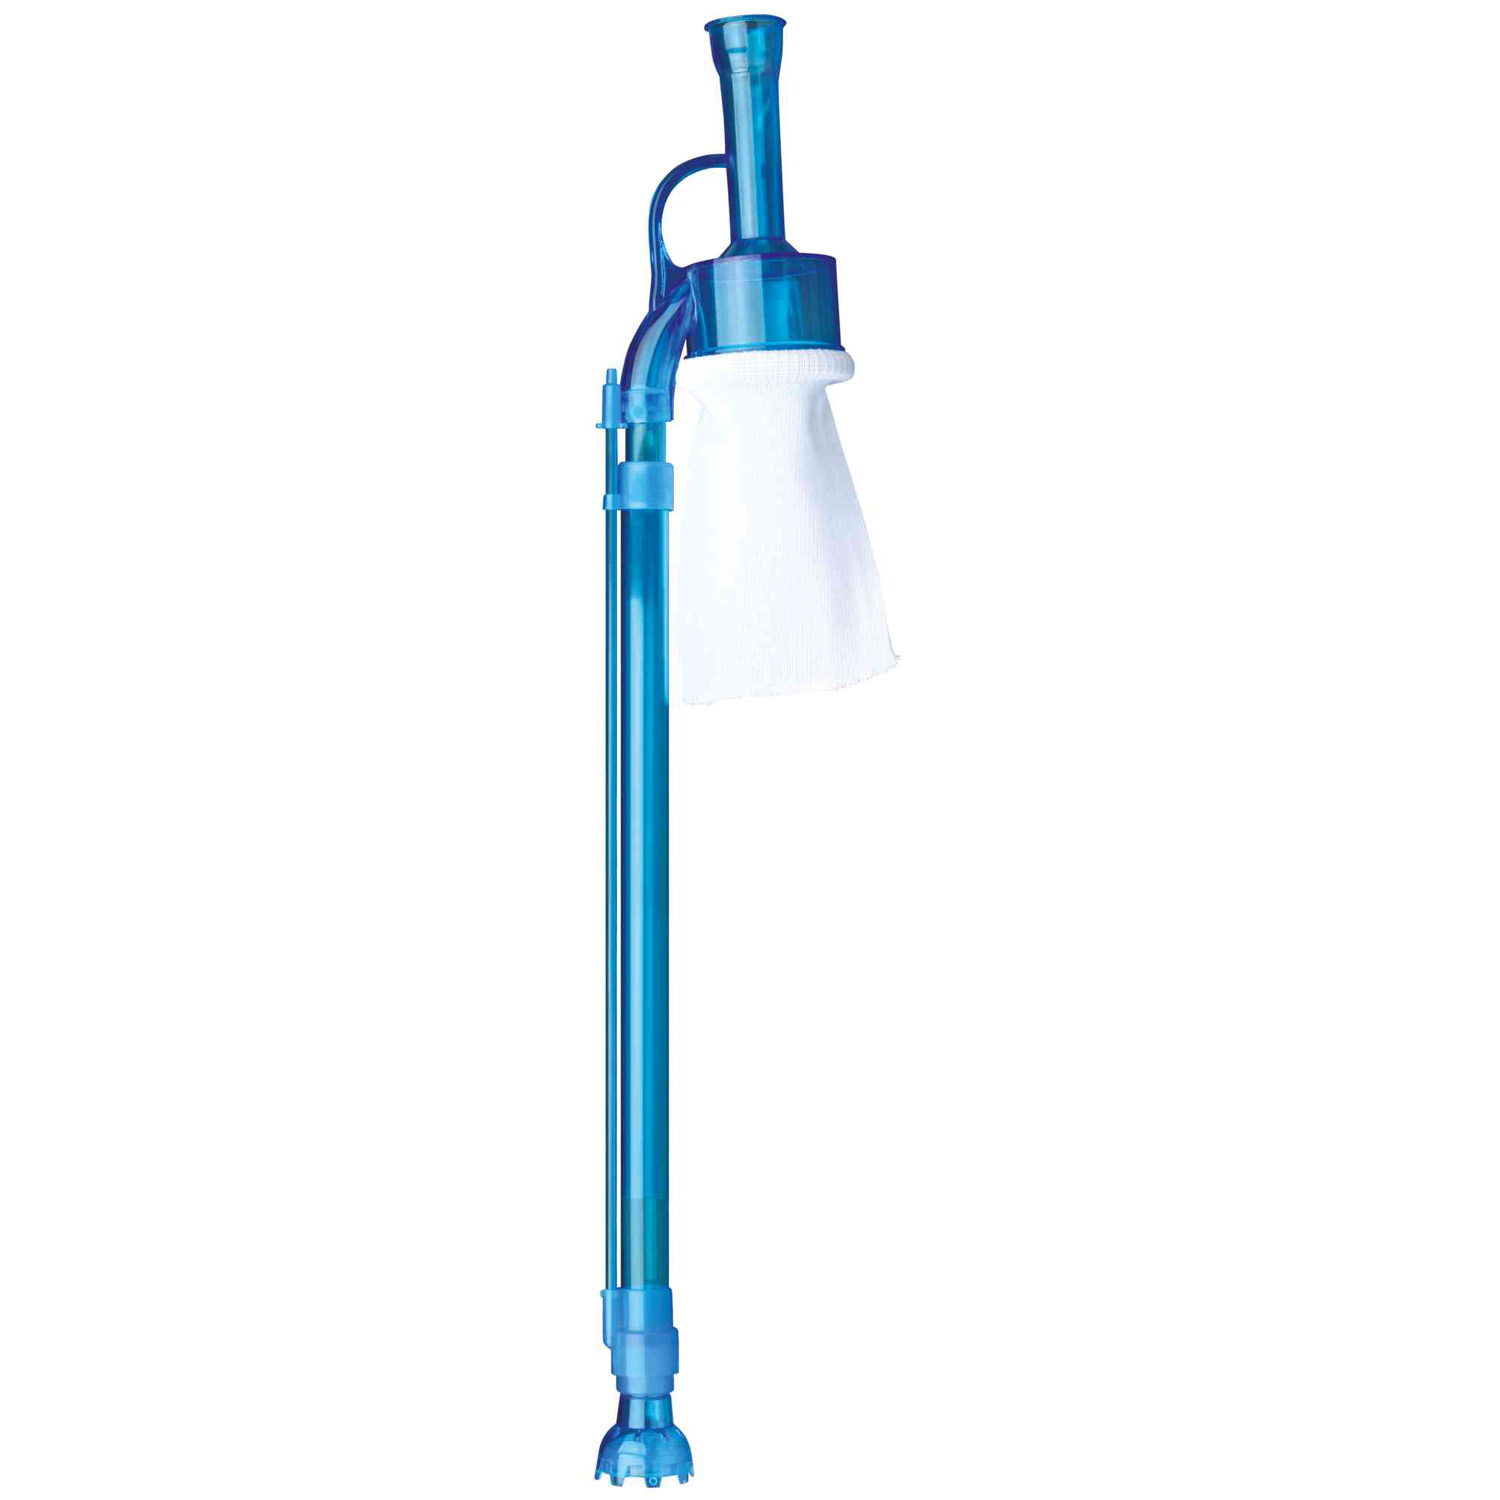
As alternative, if you are an aquarist you will probably know the grave cleaners used to remove algae and any other dirt from aquariums (picture #3). This cleaner uses the same working principle and it is perfect for our purpose. It has a rigid pipe to lift water and a thinner second one to drive air into the lower section of the water pipe. You will not need the upper section of the cleaner (it is removable). This type of gravel cleaner can be found in aquariums shops or, maybe you can conduct a search in Amazon or AliExpress. This will be our choice for the hydroponic kit.

Img.#1 Airlift operating principle 
Img.#2 Air injector 
Img.#3 Gravel cleaner
An airlift system works fine if you make a correct choice about water pipe length and diameter. A good choice could be a 7-12 mm. diameter (aquarium grave cleaners is about 10 mm.). It can be useful to test it with the IKEA solution container full or half water. Water flow depends on the submerged part of the water pipe (hs) and the lift height above the water (hl), see picture #1.
| ITEM | Shop Link | Cost |
|---|---|---|
| Grave cleaner | Grave cleaner (Amazon) | 11 € |
| Air compressor | Air compressor (AliExpress) | 4 € |
Follow technical details of the air compressor used in the original Waterfam kit, but you can use any other aquarium compressor with similar specifications and probably cheaper.
- Air flow: 1,3 L/min.
- Aire pressure 12KPa
- Noise level 40dB.
- Power consumption 1,8 W
Accessories
We will need some extra accessories to complete our hydroponic kit:

Img.#4 L-Connector 
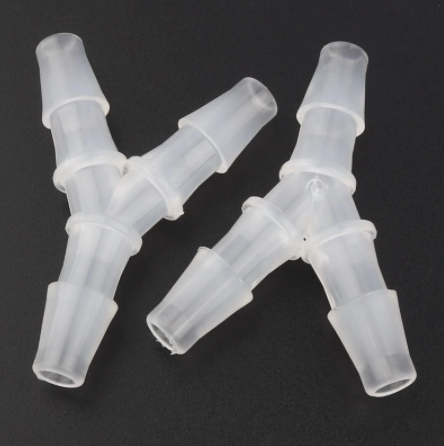
Img.#5 Y-Connector 
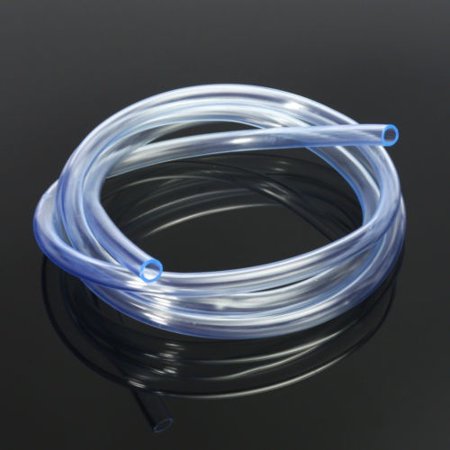
Img.#6 PVC Hose

| Item | SHOP Link | Cost |
|---|---|---|
| 8/8mm L-Connector | 8/8 mm. L-Connector (AliExpress) | 1,4 € (5 pieces) |
| 8/8/8 mm Y-Connector | 8/8/8 mm. Y-Connector (AliExpress) | 1,5 € (5 pieces) |
| 8/10 mm. PVC hose | 8/10 mm. Hose (AliExpress) | 1,4 € (1 m.) |
Building your hydroponic kit
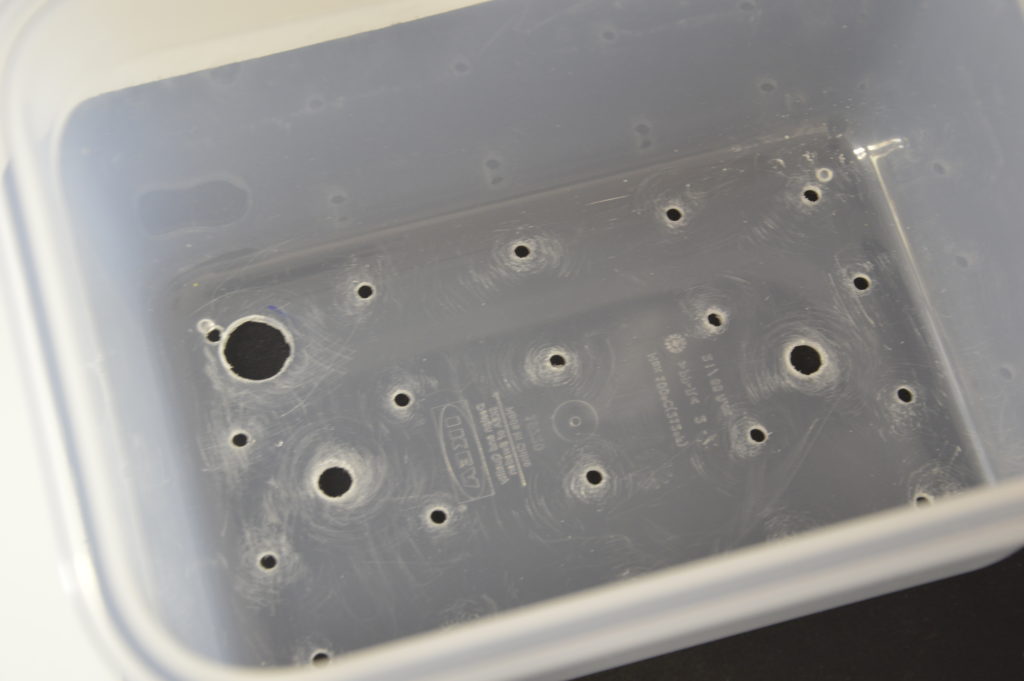
Img.#7 Plant container 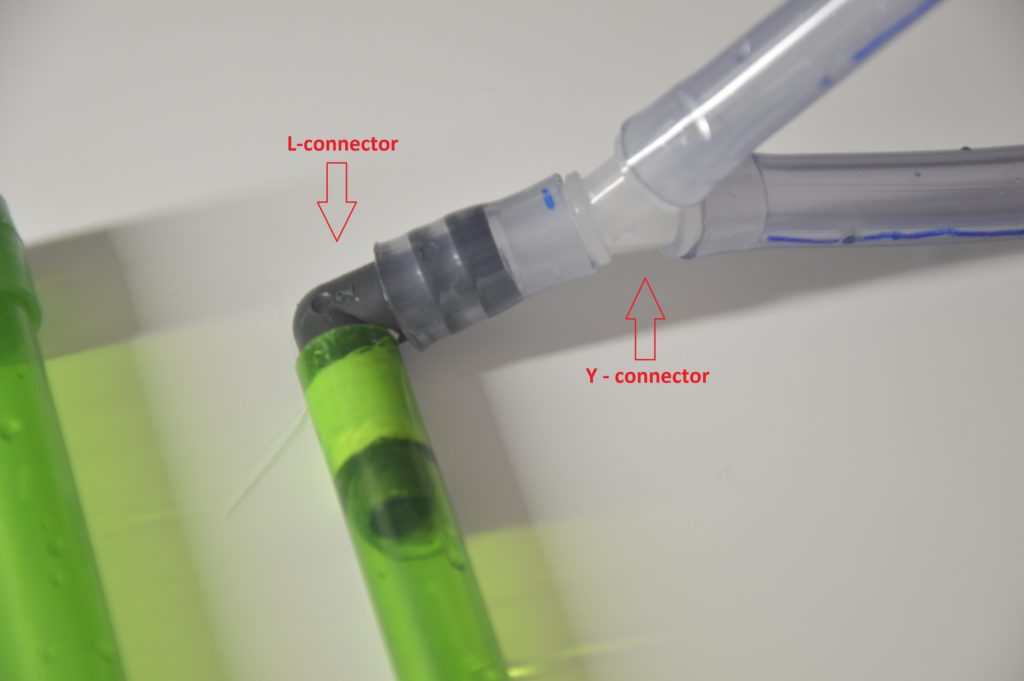
Img.#8 L & Y Connectors 
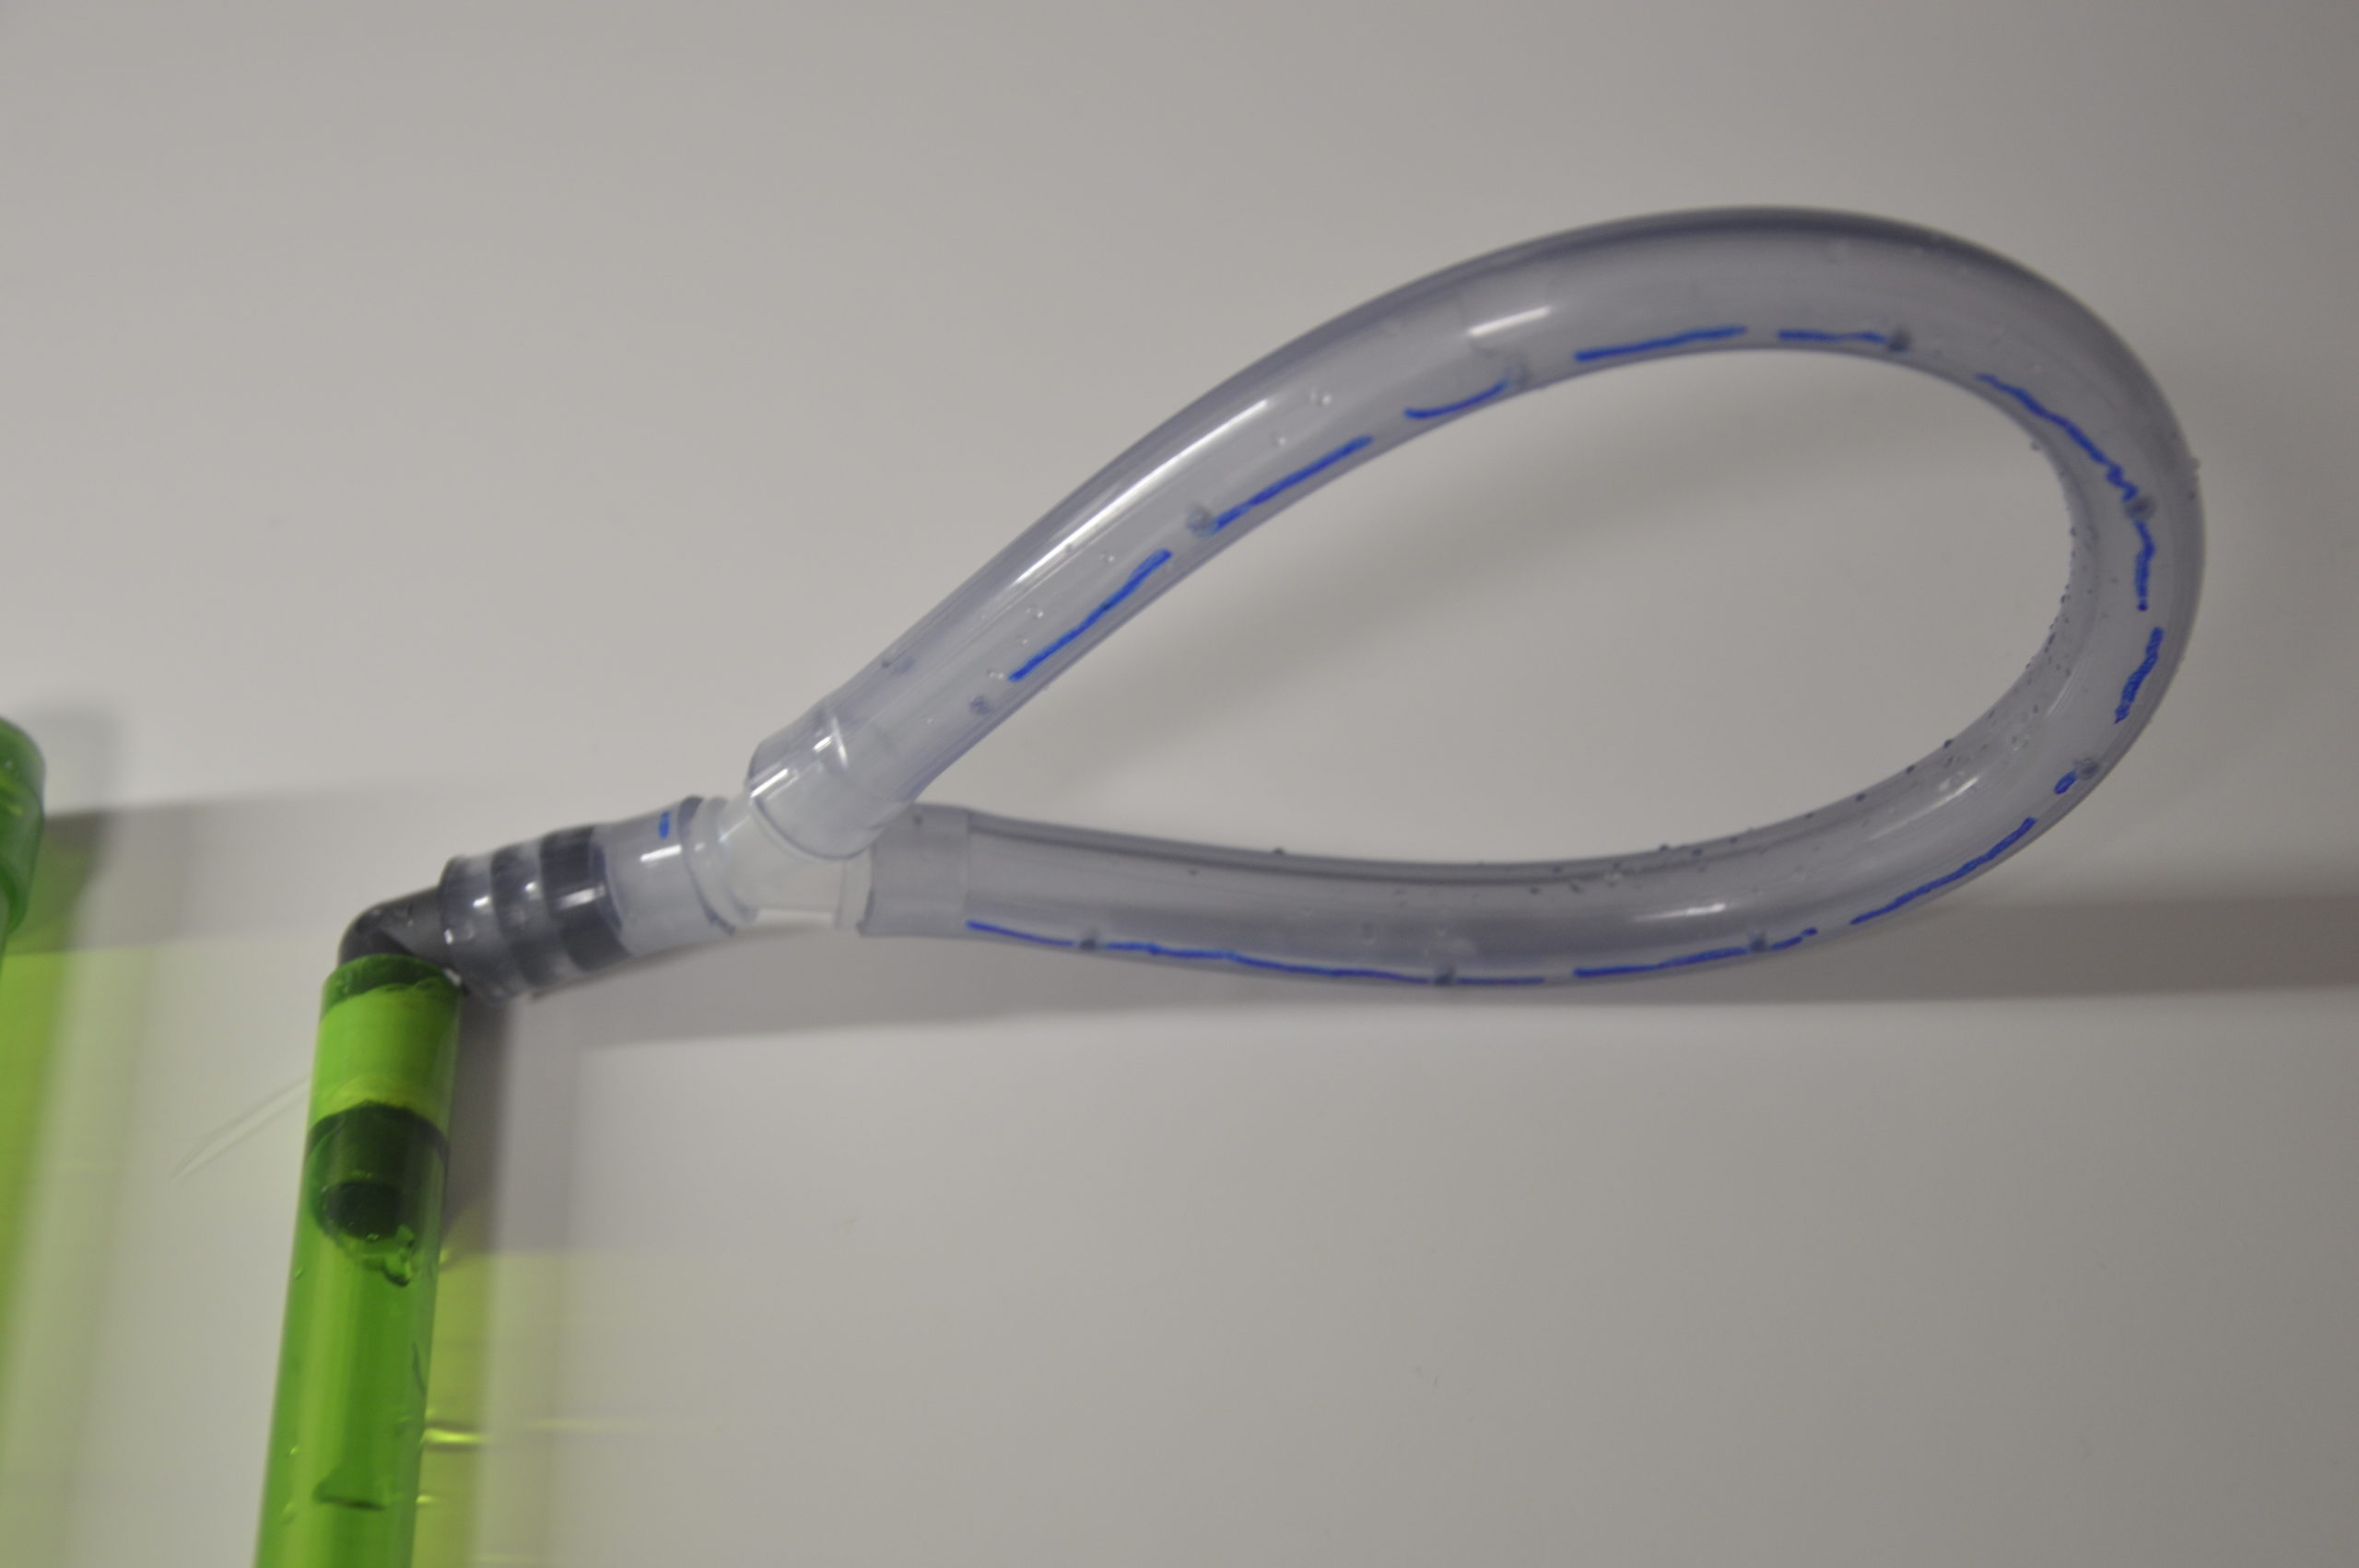
Img.#9 Hose connection 
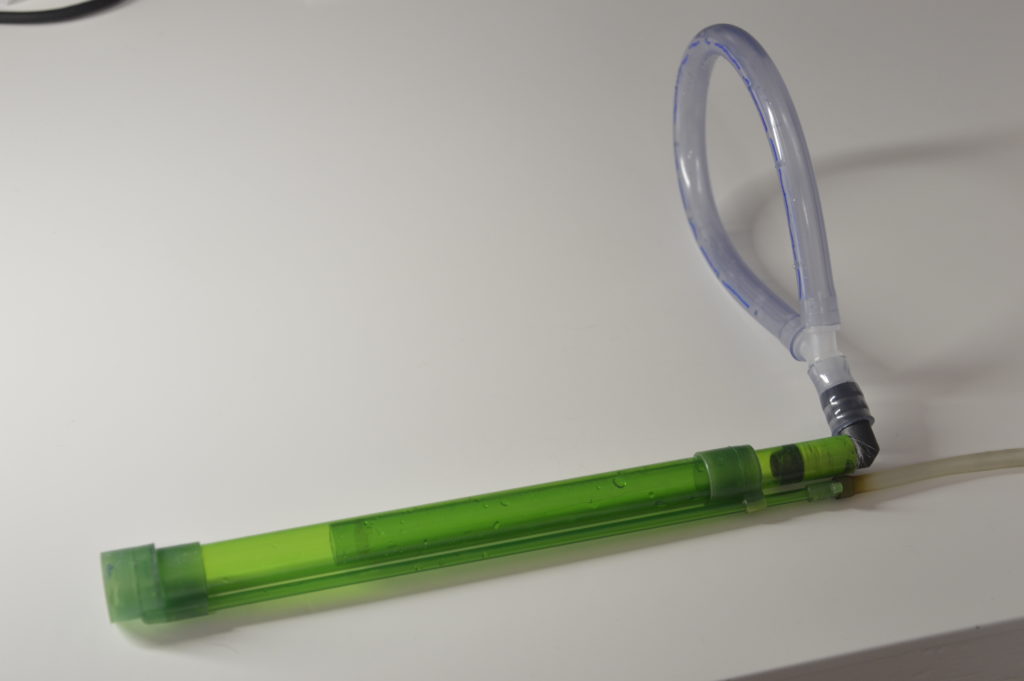
Img.#10 Full assembly


First: Make holes into the plant container
You must make holes into the plant container to allow water to be recovered by the solution container (picture #7). 4 or 5 mm. of diameter should be enough. It is a good idea to drill two bigger holes to prevent overflows. The upper-left hole is for the water pipe and the air tube.
Second: Mount the water pipe and drip ring
Some gravel cleaners have a telescopic pipe that it is an interesting feature to adapt it to the height’s container, this is our case. Picture #8 shows L and Y connections to the water pipe and the drip ring. Y-connector is a little long for our system so, we have cut the first section on every side.
Drip ring has nine equidistant small holes of 2mm. See picture #9. Picture #10 shows all parts ready to assembly.
Third: Build the kit
Img.#11 Airlift system 
Img.#12 Full assembly 
Img.#13 Full assembly


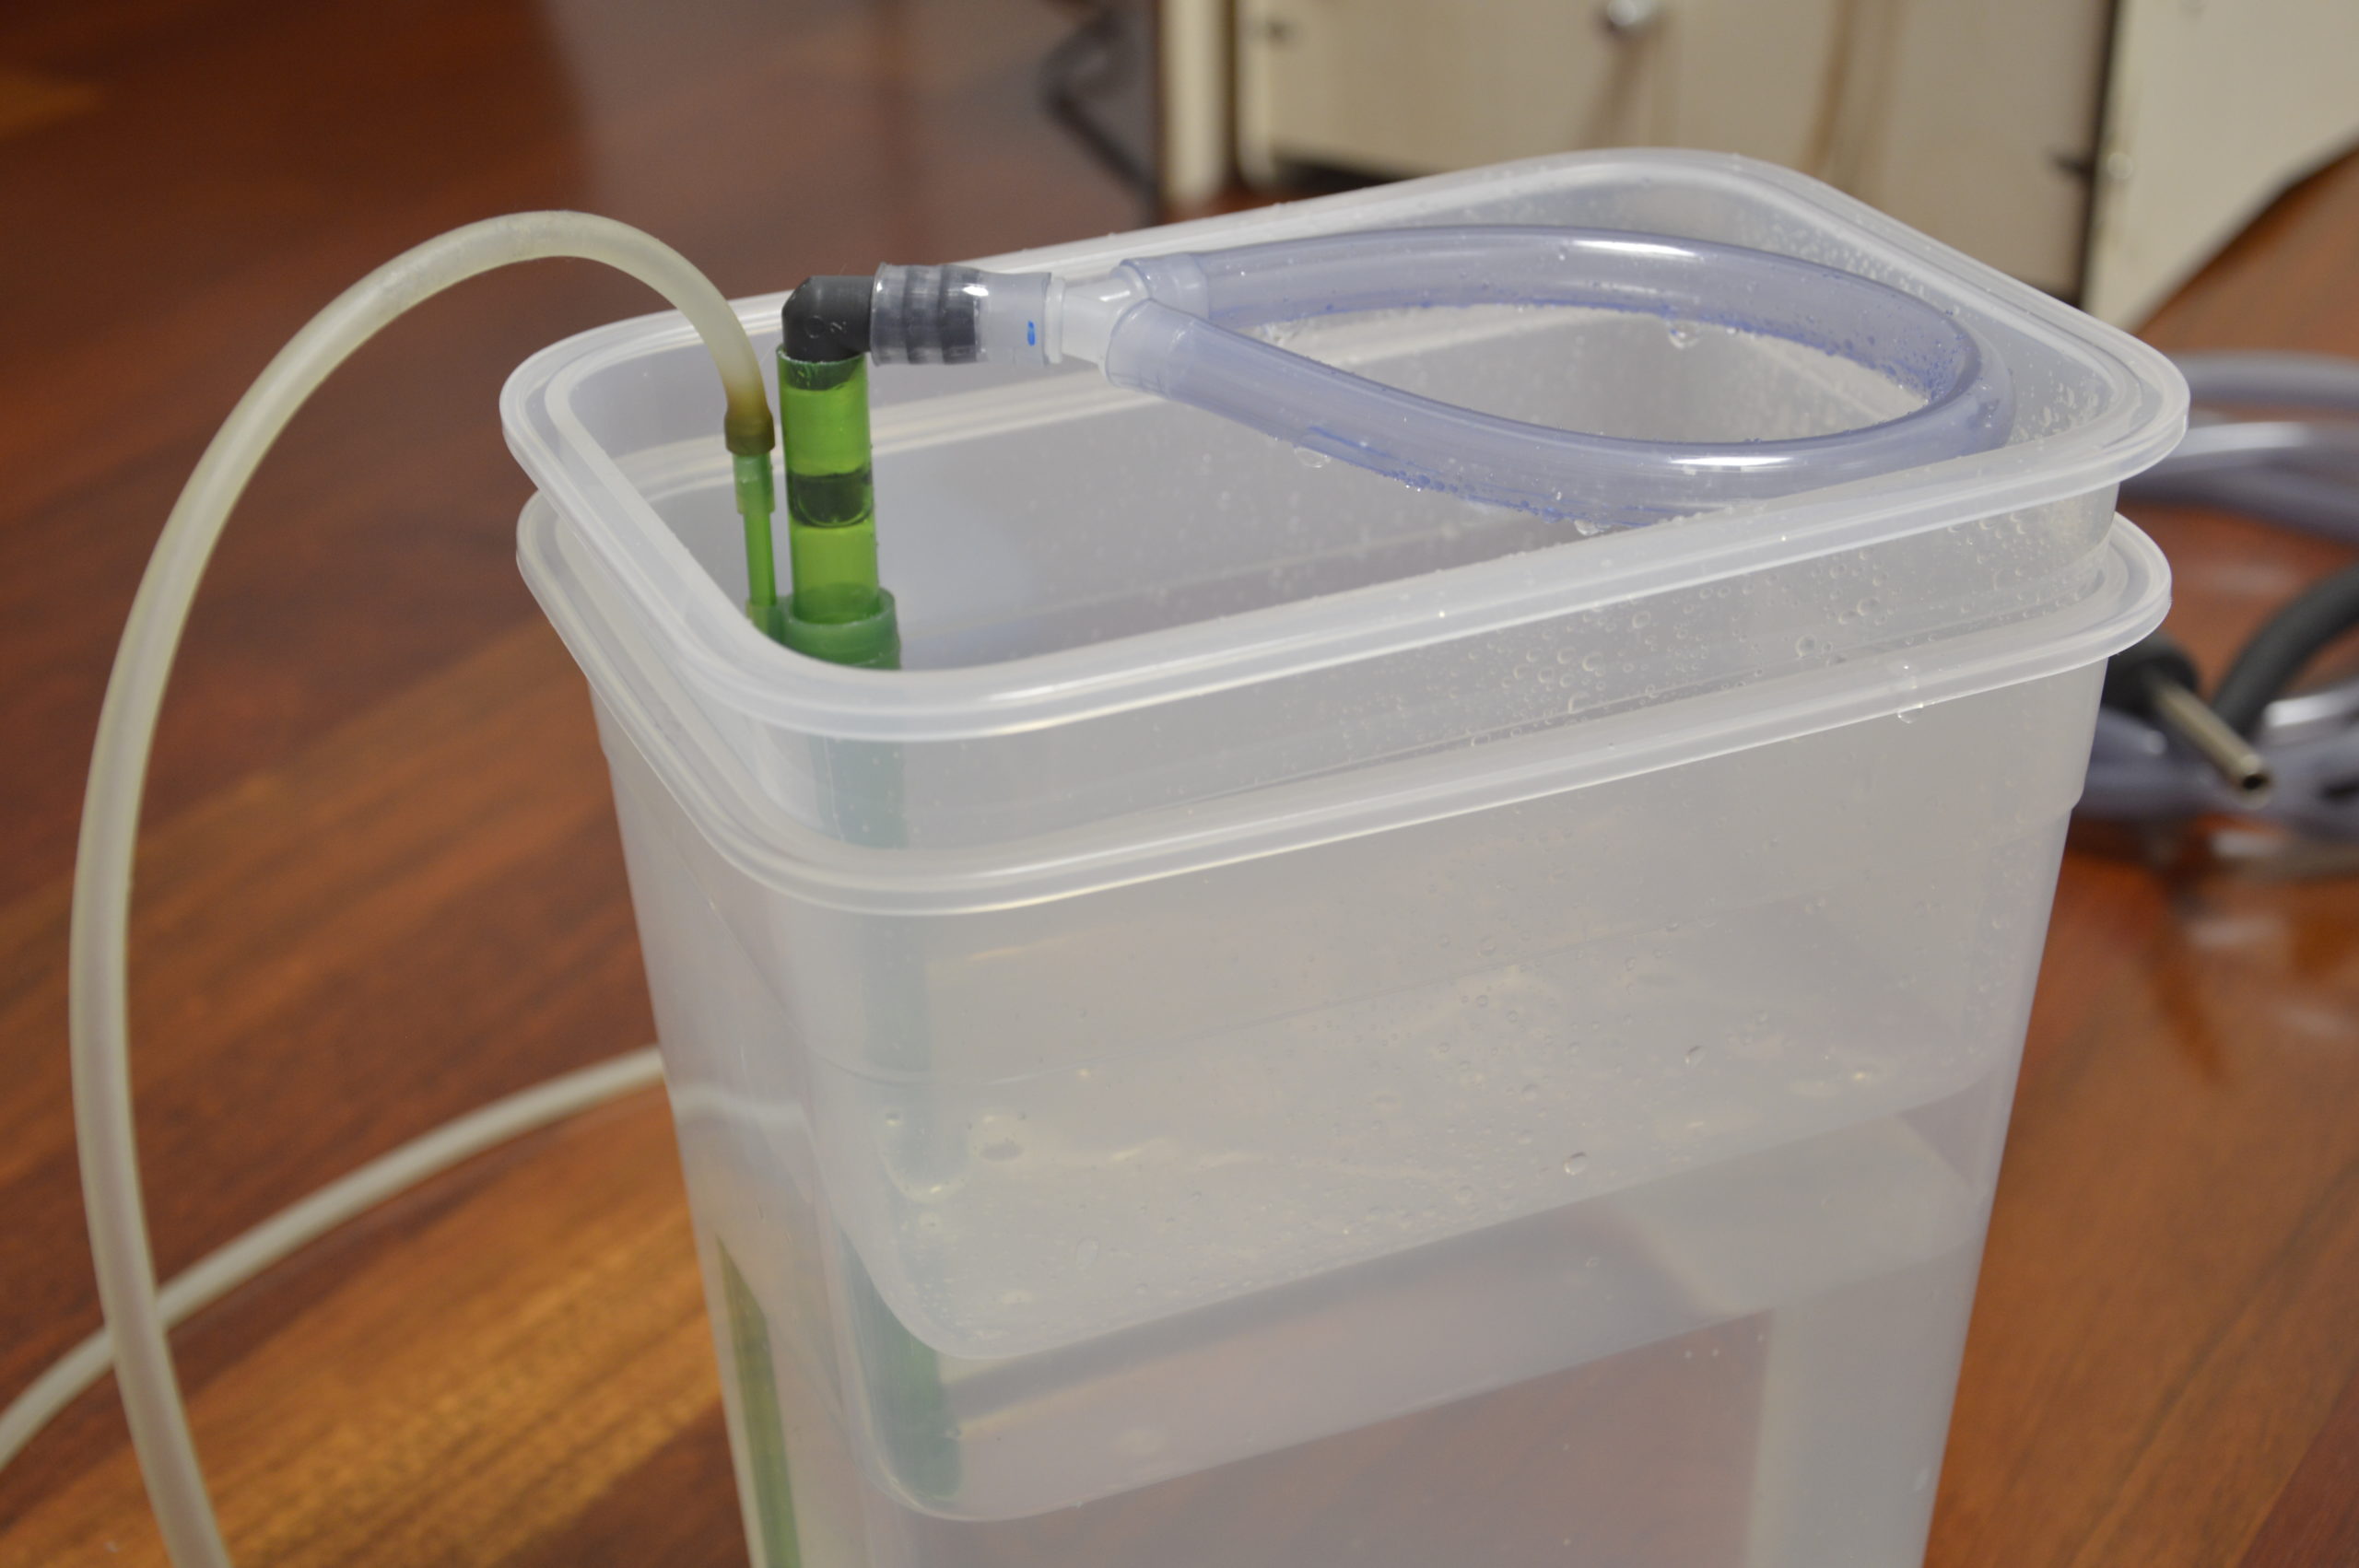
Previous pictures show several views of the kit fully assembled and working. Maybe this could not be the best design for these small containers but we have tried to keep the original AstroPlant system. We will try to optimize this solution in the future.
And finally the AstroPlant hydroponic kit in action…
Visit the AstroPlant GitHub repo to find full information about the project or visit de AstroPlant GitBook to get the Official AstroPlant documentation. You can find a copy of these instructions in the AstroPlant GitBook for community projects.
Please, feel free to contribute, improve our documents or email us with questions, we appreciate any feedback.
Credits
Miguel A. Riola
Master & Commander
miguel.riola.lopez@gmail.com
Marco Riola
10 years old young engineer
Technical solutions & drawings
Leo Riola
6 years old astrophotographer